Yesterday, I did a how to guide on using VLC media player for downloading YouTube videos and today we are going to explore another less known feature in VLC media player. Can you guess what it can be?
You will be surprised to know that VLC media player can be also used as a screen recording tool. This and many more other features are a reason why VLC is aptly titled as the swiss knife of media players.
While its always better to go for dedicated screen recording programs and tools, but if you are looking for a free tool for recording your desktop’s videos, VLC media player’s video capturing feature might come handy in times when you don’t want to spend on a dedicated video recording software.
The instructions below will guide you through the process of using VLC media player to record / capture desktop video.
What you will need?
If you don’t have VLC media player installed on your computer, you can download it from the below link.
Download: VLC media player
How to Record / Capture Desktop Video using VLC Media Player
- Step 1: Download and install VLC media player and run it.
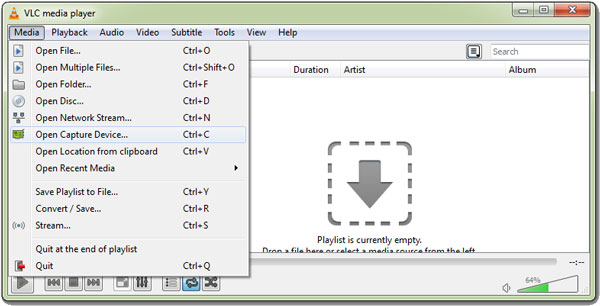
- Step 2: From VLC media player’s menu, Click on Media and select Open capture device.
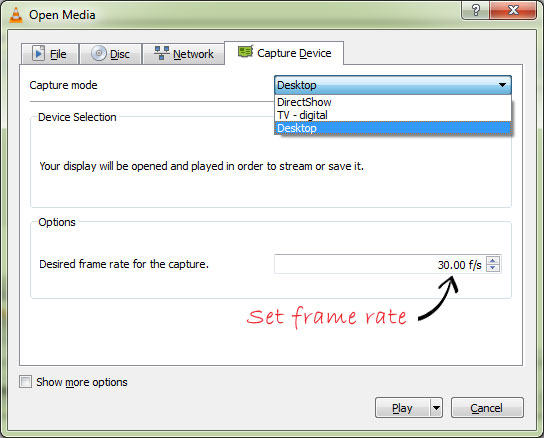
- Step 3: In the Convert dialog box that pops up, click on the Capture device tab and select Desktop from the capture mode drop down menu. Next set the frame rate. The higher the frame rate the smoother will be the recorded video but the video size will also increase accordingly.
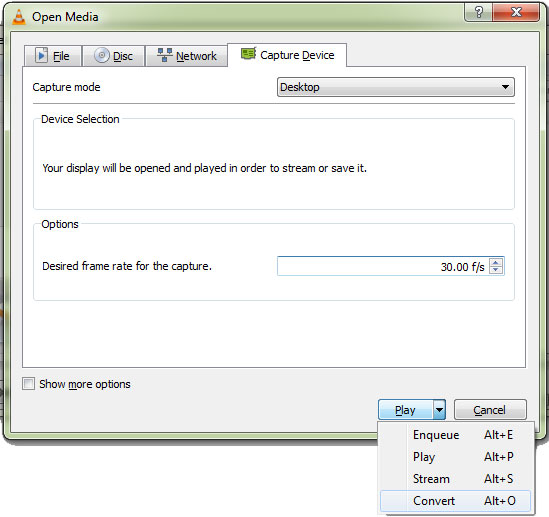
- Step 4: Click on the arrow icon beside the play button and select Convert.
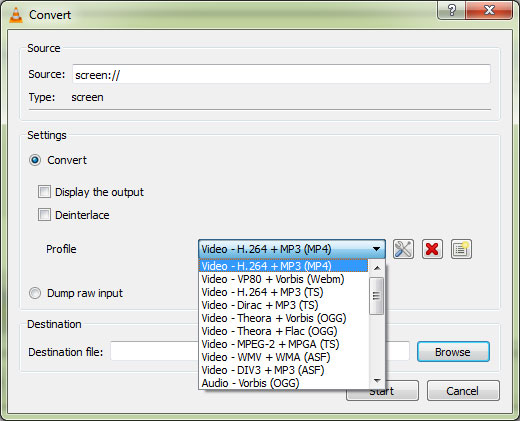
- Step 5: In the next dialog box, select a video and audio output format from the profile drop down menu.
- Step 6: Next click on the Settings icon beside the audio and video format drop down. In the dialog box that opens up, click on the Video codec tab and set the bit rate value as 2000 kbps or higher. Click on Save to save the settings.
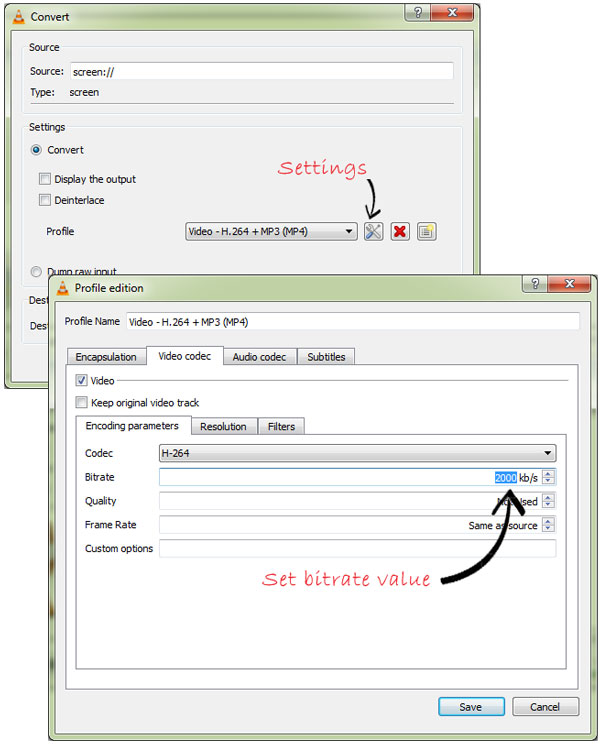
Note: The quality and size of the video depends on the bit rate value. The higher the bit rate value, the quality of the video will be high and even the size of the video will increase.
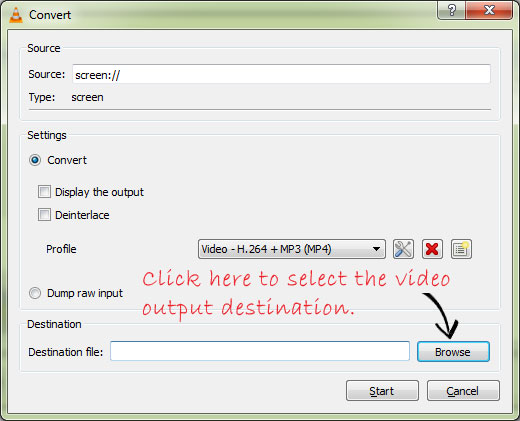
- Step 7: In the Convert dialog box, click on the Browse button beside destination, type in a name for the output file and then click on Save.
- Step 8: Finally click on the Start button to record your desktop’s video.
I have personally used this method to record desktop video with VLC media player and surprisingly the quality of the output video was very clear and the size was even smaller compared to other dedicated screen recording programs available. Although VLC does have a option to record audio simultaneously with the video, but somehow it didn’t work for me. Do try it on your computer and let me if it works.
Cool, I never thought that VLC could have such useful function. I will try it later. Aside from using VLC, Acethinker Free Screen Recorder is another good choice to do screen recording, it’s my first choice, it’s free and even allows for editing.